Processing
Processing Frames to Video
Processing Movie Maker II makes this easy, use code snippet to saveFrames in draw:
 if (enableFrameSave) {
    tx = tx + 1;
    if (tx < max_frames_save) {
      pictureSelected = pictureSelected + 1;
      if (pictureSelected == N) {
        pictureSelected = 0;
      }
    } else {
      enableFrameSave = false;
    }
    saveFrame("frame/art-######.png"); // Saves each frame as art-000001.png, etc.
  }
Capture picture
code
Capture pictures from Video
Code snippet, which save and edit frames from video to local drive.
import processing.video.*;
Movie myMovie;
int x = 0;
int maxloop = 450; // 80;
int startloop = 50;
//Pimage photo;
PImage photo, maskImage;
void setup() {
  // size(640, 360);
  //size(360, 640);

  background(0);
  size(360, 500);
  maskImage = loadImage("karate-mask.png");
  // myMovie = new Movie(this, "skootti.mp4");   //
  myMovie = new Movie(this, "karate.mp4");
  myMovie.play();
}

void draw() {

  // background(255); // take this out.. get smooth
  photo = myMovie; //image(myMovie, 0, 0);

  //  print(photo.width);
  // tint(50);

  if (x>1) {
    // photo.mask(maskImage);


    // image(myMovie, 0, 0);


  // https://forum.processing.org/one/topic/how-to-change-the-color-of-each-pixel-in-an-image.html
    image(photo, 0, 0);

    loadPixels();
    photo.loadPixels();
    for (int y = 0; y < height; y++) {
      for (int x = 0; x < width; x++) {
        int loc = x + y*width;

        // The functions red(), green(), and blue() pull out the 3 color components from a pixel.
        float r = red(photo.pixels[loc]);
        float g = green(photo.pixels[loc]);
        float b = blue(photo.pixels[loc]);

        // print(r + "," + g + " .." );


        if (r<200 | g < 200 | b < 200) {
          pixels[loc] =  color(255, 0, 0);
        } else {

          // not working?
          //pixels[loc] =  color(255, 255, 255, 255);

          // https://processing.org/discourse/beta/num_1191532471.html
          // white background is ok.
        }
      }
    }

    updatePixels();
  }


  if (x < maxloop) {
    // line(x, 0, x, 100);
    x = x + 1;
  } else {
    noLoop();
  }
  // Saves each frame as line-000001.png, line-000002.png, etc.

  if (x>=startloop) {
    saveFrame("outputKarate2/karate-######.png");
  }
}

void movieEvent(Movie m) {
  m.read();
}

// https://processing.org/reference/saveFrame_.html
// https://forum.processing.org/one/topic/how-can-i-save-a-frame-of-video-without-drawing-it-on-the-screen.html
Computer Graphics
In the end of 80s and on 90s it was recommendable to sketch on paper before implementing Simon’s Basic code or use some editor.
However, drawing straight lines was easy with joystic and keyboard 😀.
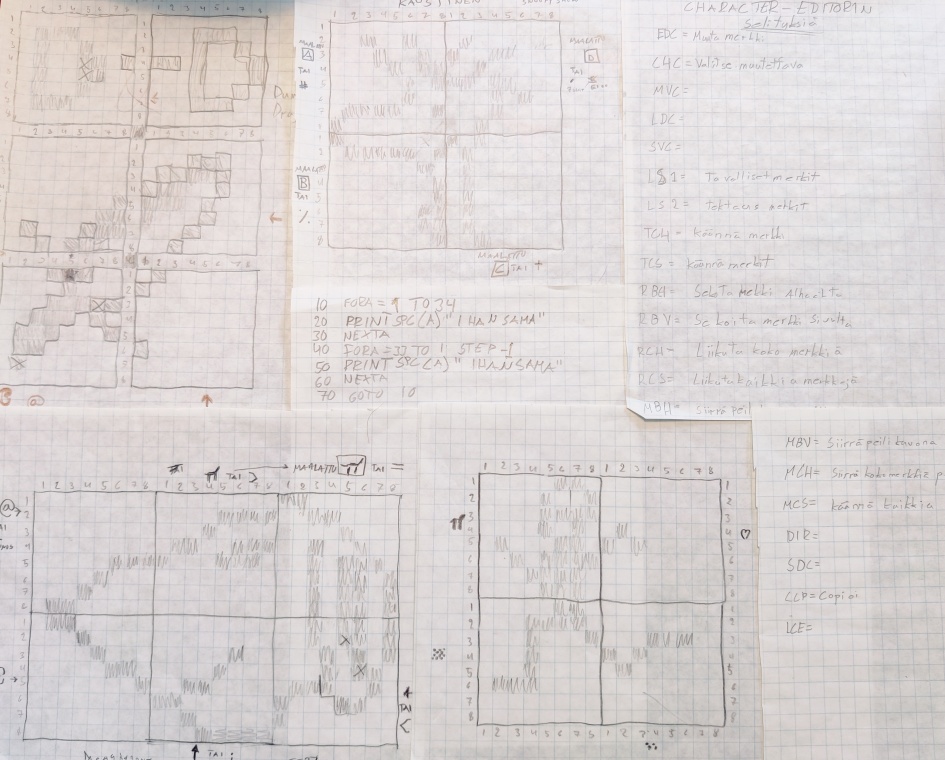
Chess - Create image and store it to a local drive
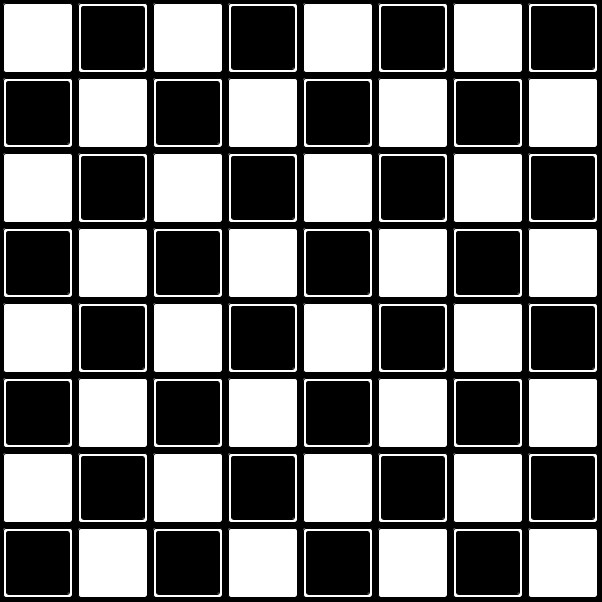
Processing code “shakki.pde”:
final int lisa  = 16;
final int lisareuna = 10;
final int WIDTH = 600+1+lisa*2;
final int HEIGHT = 600+1+lisa*2;
final int BLOCKX = (WIDTH-1-lisa*2) / 8;
final int BLOCKY = (HEIGHT-1-lisa*2) / 8;
final int pyoreys = 3;
final int lisasiirto = 3;
int lauta = 1;


// processing size provided here nowadays! [2021]
// output here: git\talonendm.github.io\assets\cutter
public void settings() {
  size(602, 602);
}

void setup() {
  //  if (lauta == 1) {
  //   size(602, 602);
  //  } else {
  //    size(WIDTH, HEIGHT);
  //  }
  noLoop();
}

void draw() {
  background(0, 0, 0);

  if (lauta == 1) {

    for (int i = 0; i < 8; i ++) {
      for (int j = 0; j < 8; j ++) {
        if ((i + j + 1) % 2 == 0) {
          fill(255, 255, 255); // white
          rect(i * BLOCKX+lisasiirto, j * BLOCKY+lisasiirto, BLOCKX-lisasiirto*2, BLOCKY-lisasiirto*2, pyoreys);
          fill(0, 0, 0); // black
          rect(i * BLOCKX+pyoreys+lisasiirto, j * BLOCKY+pyoreys+lisasiirto, BLOCKX-pyoreys*2-lisasiirto*2, BLOCKY-pyoreys*2-lisasiirto*2, pyoreys);
        } else {
          fill(0, 0, 0); // black
          rect(i * BLOCKX, j * BLOCKY, BLOCKX, BLOCKY, pyoreys);
          fill(255, 255, 255); // black
          rect(i * BLOCKX+pyoreys, j * BLOCKY+pyoreys, BLOCKX-pyoreys*2, BLOCKY-pyoreys*2, pyoreys);
        }
      }
    }
  }
  if (lauta == 2) {
    fill(0);
    rect(1, 1, WIDTH-2, HEIGHT-2, 5);
    rect(1+lisareuna, 1+lisareuna, WIDTH-2-lisareuna*2, HEIGHT-2-lisareuna*2, 3);
    for (int i = 0; i <= 8; i ++) {
      for (int j = 0; j <= 8; j ++) {
        fill(255, 55, 255);
        stroke(255);
        line(i * BLOCKX+lisa, lisa, i * BLOCKX+lisa, HEIGHT-lisa-1);
        line(lisa, j * BLOCKX+lisa, WIDTH-lisa-1, j * BLOCKX+lisa);
      }
    }
  }
  println("READY");
}
void mousePressed() {
  save("shakki3.jpg");
  exit();
  println("SAVED");
}
Libraries
- path:
Processing
- Processing 2.2.1: Sketch → import library → add library → find “jpen” not found → “tablet” → you are using build … (too old for the library)
- Processing 3.5.4: Sketch → import library → add library → Find “Tablet” (Tablet 2.0-alpha3) 3/2021. Install. Select: File → Examples → Cantributed Libraries → Tablet → BasicDrawing. This worked!
Manually add folder
- Location: - later
- see discussion How to add external libraries in processing.
Pen tablet experiments
Experiments performed with Huion H430P and Processing 3.5.1 Tablet library. The origanal code examples by by Andres Colubri.
- Working Area: 4.8 x 3 Inch
- Tilt Function: No
- Pen Model: PW201
- Pen Pressure: 8192 Levels
Pressure
Tilt
H430P doesn’t have Tilt function. However, it is expected that tilt values could be used quite easily in Processing code
import codeanticode.tablet.*;
Tablet tablet;
void setup() {
	tablet = new Tablet(this);
}
void draw() {
  if (tablet.getPressure() > 0) {
    float x = tablet.getTiltX();
    float y = tablet.getTiltY();
	print(x +", " + y);
  }
}
Tailored drawing application
- Free ones are full of ads AND
- paint is just crap + (no pressure detection etc.)
- Gimp is too complicated for newcomers. I have years of experience (Gimp, Photoshop) but still new things to learn (all the time). Being honest, I think it easier to code tailored software for certain purpose than use Youtube to find how to something X or Y in very sophisticated software.
Brush experiments
Line with opacity doesn’t look nice..
	color vari;
	int opaci;

	...

	vari = color(255,255,255, opaci);

	...

	stroke(vari);
    strokeWeight(20 * tablet.getPressure());
    line(pmouseX, pmouseY, mouseX, mouseY);

    strokeWeight(16 * tablet.getPressure());
    line(pmouseX, pmouseY, mouseX, mouseY);

    stroke(vari);
    strokeWeight(12 * tablet.getPressure());
    line(pmouseX, pmouseY, mouseX, mouseY);

    stroke(vari);
    strokeWeight(4 * tablet.getPressure());
    line(pmouseX, pmouseY, mouseX, mouseY);
ArrayList
Use ArrayList to have “created” objects as arrays. See code example below:
import java.util.Collections; // https://forum.processing.org/two/discussion/626/cannot-find-anything-named-collections-arraylist
...
ArrayList<Viiva> viivat = new ArrayList<Viiva>();
...
for (Viiva viiva : viivat) {
    viiva.displayViiva();
}
...
class Viiva {

  int x0, y0, x1, y1;
  float w0, w1;
  color c;

  Viiva(int x0_, int y0_, int x1_, int y1_, float w0_, color c_) {
    x0 = x0_;
    y0 = y0_;
    x1 = x1_;
    y1 = y1_;
    w0 = w0_;
    c = c_;
  }
  ...
}
- clear arraylist viivat as viivat.clear()
Drawing application
Full screen Java app for tablet pen. (TabletJavaTest_jt.pde)
- t) redraw background image with tint.
- p) enable / disable backgroud image.
- n) new drawing
- r) refresh canvas (e.g. after undo)
- c) select color, activate and deactivate palette.
- o) set line vector to center of the canvas
- -) smaller brush for pressure
- +) larger brush for pressure pen
- b) smaller minimum brush size
- B) larger minimum brush size
- a) animate drawing from the beginning to the end
- 8) decrease size by 5%
- 9) increase size by 5%
- u) undo last line
- v) undo first line of the drawing
- s) save png file to “savedpics” folder.
TODO: save as vector csv file.
code snippets
re-center lines
Move objects to center of the canvas.
// -------------------------------------------------------------
// Re-center vector drawing: -----------------------------------
// -------------------------------------------------------------
void centerObject() {
  int min_x = width;
  int max_x = 0;
  int min_y = height;
  int max_y = 0;

  for (int i = 0; i < viivat.size(); i++) {
    Viiva viiva = viivat.get(i);

    // x:
    if (viiva.x0 < min_x) min_x = viiva.x0;
    if (viiva.x1 < min_x) min_x = viiva.x1;

    if (viiva.x0 > max_x) max_x = viiva.x0;
    if (viiva.x1 > max_x) max_x = viiva.x1;

    // y:
    if (viiva.y0 < min_y) min_y = viiva.y0;
    if (viiva.y1 < min_y) min_y = viiva.y1;

    if (viiva.y0 > max_y) max_y = viiva.y0;
    if (viiva.y1 > max_y) max_y = viiva.y1;
  }

  background(taustavari);
  taustakuva_redraw(true);

  // update line coordinates:
  for (int i = 0; i < viivat.size(); i++) {
    Viiva viiva = viivat.get(i);
    viiva.centerlines(min_x, max_x, min_y, max_y);
  }

  // Area of the selection:
  strokeWeight(1);
  stroke(0, 255, 0, 20);
  noFill();
  rect(min_x, min_y, max_x - min_x, max_y - min_y);  // 3rd and 4th parameter are defining the size of the rect
  keskitaPiirustus = false;
}
// -------------------------------------------------------------